
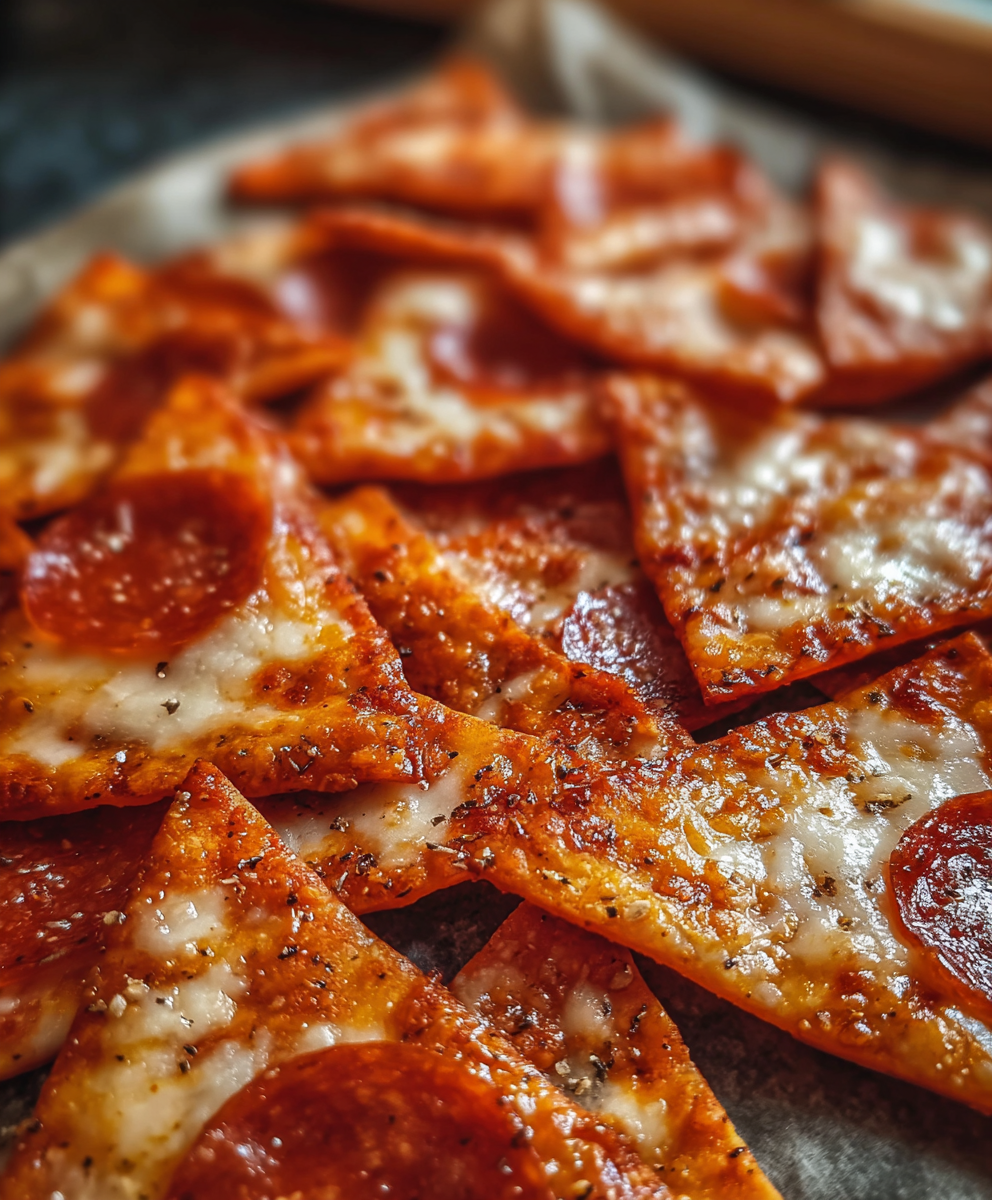
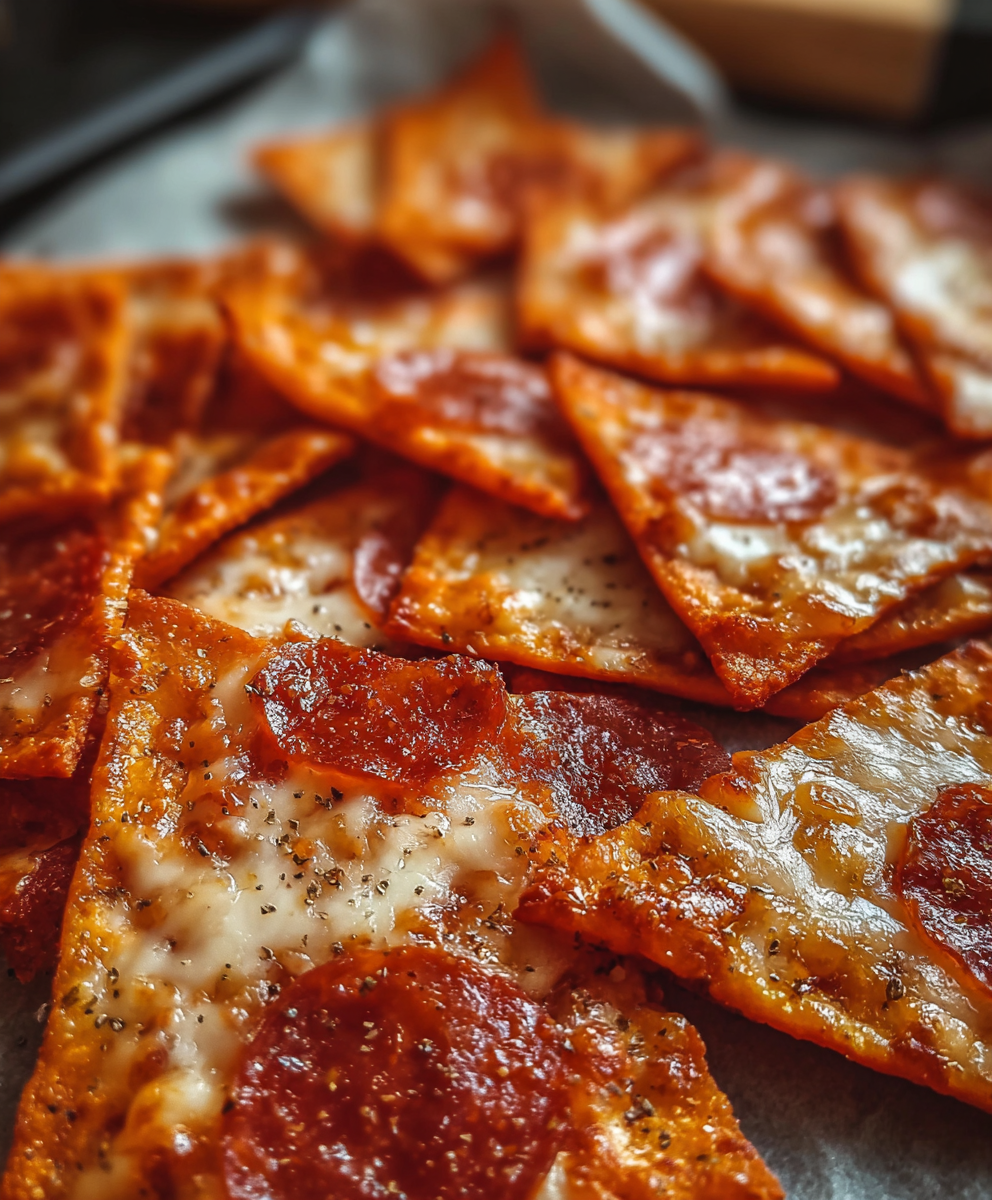
Crispy Pizza Chips

A crunchy, pizza-flavored snack made from tortillas topped with sauce, melty cheese, and your favorite toppings—perfect for parties and weeknight cravings.
This recipe for Crispy Pizza Chips was born out of a weeknight hunger pang and a small refrigerator full of fixings. I discovered the combination during a busy evening when I wanted the joy of pizza without the wait for dough to rise or a long delivery time. What started as an experiment quickly became a household favorite because it delivers that beloved pizza flavor in a fraction of the time, with a crispness that keeps everyone reaching back into the bowl.
The texture is the real star: tortillas transform into thin, golden chips with lightly bubbled edges when baked just long enough. The sauce provides the familiar tang of tomato; a generous blanket of mozzarella melts into gooey patches and then crisps slightly at the edges. Toppings add bursts of flavor without weighing the chip down. I often make a double batch for movie night and have learned small tricks—like pre-baking the tortillas and using a slightly thicker sauce—that make the difference between soggy slices and addictive crunch.
Why You'll Love This Recipe
- This snack comes together in under 25 minutes from start to finish, making it ideal for last-minute guests or an after-school treat.
- It uses pantry staples—tortillas, jarred pizza or marinara sauce, shredded cheese—and whatever toppings you have on hand, which saves time and money.
- Make-ahead friendly: you can pre-bake the chips and store them separately, then top and melt just before serving to keep them crisp.
- Highly customizable: switch cheeses, try vegetarian or meat toppings, and adjust seasonings to suit children or spice lovers.
- Great for parties: the bite-sized format is perfect for grazing tables, and one sheet makes 12–16 chips depending on tortilla size.
- Kid-approved: kids love the novelty of pizza in chip form and it’s an excellent way to sneak in some diced vegetables under the cheese.
In my experience, guests comment first on the crunch and then on how familiar the flavors feel despite the unusual shape. Friends have asked for the "secret" to the perfect crisp—it's mainly about drying the tortillas and using a sauce that isn't too watery. That small discovery changed everything and turned this into a repeat request at gatherings.
Ingredients
- Tortillas: 4 tortillas (6–8 inch) Corn or flour tortillas both work—choose corn for a traditional, naturally gluten-free crunch or flour for a slightly softer, more pliable chip. Look for fresh tortillas without preservatives for the best texture.
- Pizza sauce: 1 cup pizza sauce or marinara A slightly thicker jarred sauce helps prevent sogginess. Brands like Rao's or a robust local marinara hold up well; if your sauce is thin, simmer it briefly to reduce excess liquid.
- Cheese: 1 cup shredded mozzarella Freshly shredded melts better than pre-shredded blends, which often contain anti-caking agents that affect melt. Mix in a little sharp cheddar or provolone for depth, or sprinkle grated Parmesan at the end for saltiness.
- Toppings: 1 cup assorted toppings Customize with 1 cup total of pepperoni, diced bell peppers, sliced olives, mushrooms, or cooked sausage. Keep toppings small and thin so they crisp rather than weigh down the chip.
- Seasoning: 1 teaspoon Italian herbs Use a dried blend of basil, oregano, and thyme, or sprinkle on fresh basil after baking for brightness.
- Garlic powder: 1 teaspoon Adds warmth—garlic powder disperses evenly and crisps during baking.
- Crushed red pepper: 1/2 teaspoon For a spicy kick; omit or reduce for children.
Instructions
Preheat and prepare: Preheat the oven to 425°F. Line a baking sheet with parchment paper or a silicone mat to prevent sticking. Arrange the 4 tortillas flat on the sheet. If you want identical chip sizes, stack and cut each tortilla into 6–8 wedges with a pizza cutter—this gives 24–32 chips depending on wedge size. Dry the tortillas: Brush each tortilla wedge lightly with 1/2 teaspoon olive oil or spray. This step helps the edges turn golden. Bake the wedges for 5–7 minutes until they just begin to stiffen and edges take on color—this pre-bake removes moisture and prevents soggy chips later. Season the base: Remove the pan and sprinkle each chip with a light pinch of the Italian herbs and garlic powder. Use about 1 teaspoon of the herb mixture across the batch so every chip has flavor without being overpowering. Top sparingly: Spoon a scant 1/2 teaspoon of pizza sauce onto each chip and spread thinly—less is more to keep the crisp. Add a small pinch of shredded mozzarella (aim for about 1 tablespoon per chip) and finish with your chosen tiny toppings. Overloading a chip will make it soggy rather than crunchy. Finish and melt: Return the tray to the oven for 5–7 minutes at 425°F, watching closely. The cheese should melt and bubble, and any edges of the chips should deepen in color. For a touch of char, switch to broil for 30–60 seconds but keep the door cracked and watch carefully to prevent burning. Cool and serve: Let the chips cool on a wire rack for 2–3 minutes to firm up. Serve warm for the best contrast of gooey cheese and crisp base. Enjoy with extra sauce on the side for dipping if desired.
You Must Know
- These chips keep well for 1–2 days at room temperature in an airtight container, but they are crispiest the same day. For longer storage, freeze un-topped chips up to 3 months.
- Nutrition note: a serving is light on calories compared with a full pizza because the base is a thin tortilla rather than dough, but toppings can add fat—watch portion sizes if counting macros.
- Use thicker pizza sauce or simmer a thinner sauce for a few minutes to concentrate flavors and reduce moisture that can make chips soggy.
- Children love a mild version—leave out crushed red pepper and use finely diced, colorful veggies to make them more appealing.
My favorite part about this preparation is how it turns leftovers and pantry staples into something festive. At a recent family gathering I served three varieties—classic pepperoni, veggie with bell peppers and onions, and a garlicky white version with Parmesan. The pepperoni batch vanished first, but the veggie chips got the most surprise compliments from guests who expected less from such a simple snack.
Storage Tips
To store, cool chips completely and place them in a single layer in an airtight container separated by parchment sheets to prevent sticking. At room temperature they remain crisp for 24–48 hours; refrigeration will make them lose crunch quickly. If you want to prepare ahead, pre-bake and cool the plain chips, then freeze in a sealed bag for up to 3 months. When ready to serve, reheat in a 350°F oven for 3–5 minutes, add toppings, and finish under the broiler for a minute to melt cheese while keeping the base crisp. Avoid microwaving as it softens the crisp texture.
Ingredient Substitutions
Swap corn tortillas for gluten-free flour tortillas if you need a wheat-free option; check the package for cross-contamination warnings. For a dairy-free version, use plant-based shredded cheese that melts well (look for brands labeled "melts like mozzarella"). If you want more pronounced flavor, replace half the mozzarella with shredded provolone or sharp cheddar; for a salty finish add 1 tablespoon grated Parmesan after baking. To reduce sodium, use low-sodium pizza sauce and rinse brined toppings like olives.
Serving Suggestions
Serve as a standalone snack or pair with a crisp salad to balance the richness. For party platters, arrange several varieties on a wooden board with small bowls of extra sauce, ranch dressing, and pickled vegetables. Garnish with fresh basil or a sprinkle of red pepper flakes for visual contrast. These chips are great with a citrusy spritz beverage for a summer gathering or alongside tomato soup for a cozy night in.
Cultural Background
These crisps are inspired by Italian-American flavors—tomato, mozzarella, and oregano—applied to a quick, snackable format popular in home kitchens that favor convenience and bold taste. The idea of using flatbreads as a base for bite-sized toppings has roots in many cultures; here we lean on classic pizza ingredients and American snack culture to create something familiar yet playful.
Seasonal Adaptations
In summer, top chips with diced fresh tomatoes, basil chiffonade, and a light drizzle of olive oil right after baking. In autumn and winter, try smoky roasted squash cubes, caramelized onions, and a sprinkling of sage. Holiday parties are perfect for themed toppings—mini pepperoni and cranberry with a touch of thyme make a festive bite, while a white garlic base topped with sautéed mushrooms and thyme leans cozy for cold-weather gatherings.
Meal Prep Tips
For make-ahead convenience, pre-bake and cool the plain chips, store them in a sealable container, and portion out sauce and toppings in small containers. When it's time to serve, assemble and broil for 30–60 seconds to melt. If packing for lunches, keep chips and toppings separate until ready to eat to preserve crispness; include a small dipping cup of sauce on the side.
These Crispy Pizza Chips are an effortless crowd-pleaser: fast, flexible, and delicious. They celebrate the joy of pizza without the fuss and are a wonderful way to bring people together over something simple and satisfying. Try them for your next gathering and make tweaks to fit your flavor preferences—this is one snack that rewards experimentation.
Pro Tips
Pre-bake tortilla wedges to remove excess moisture—this step is crucial for achieving crispness.
Use freshly shredded mozzarella for better melt and less oily residue on the chips.
If your sauce is thin, simmer it briefly to concentrate flavors and reduce moisture that causes sogginess.
Keep toppings small and thinly sliced so they crisp rather than weigh down the chip.
This nourishing crispy pizza chips recipe is sure to be a staple in your kitchen. Enjoy every moist, high protein slice — it is perfect for breakfast or as a wholesome snack any time.
FAQs about Recipes
Can I make these gluten-free?
Yes. Use corn tortillas and check the label to ensure they are certified gluten-free. Also avoid cross-contamination with shared surfaces.
Can I freeze them?
Yes. Pre-bake the plain chips and freeze in an airtight container. Reheat in the oven before topping and melting cheese.
Tags
Crispy Pizza Chips
This Crispy Pizza Chips recipe makes perfectly juicy, tender, and flavorful steak every time! Serve with potatoes and a side salad for an unforgettable dinner in under 30 minutes.
Ingredients
For the Chips
Sauce
Toppings
Seasoning
Instructions
Preheat and cut
Preheat oven to 425°F. Line a baking sheet with parchment. Stack tortillas and cut each into 6–8 wedges with a pizza cutter for uniform chips.
Dry and crisp the base
Lightly brush wedges with oil or spray and bake for 5–7 minutes until edges begin to brown and the tortillas stiffen. This removes moisture and prevents sogginess.
Season lightly
Sprinkle Italian herbs and garlic powder evenly over the pre-baked chips to build flavor into every bite.
Top sparingly
Place a scant 1/2 teaspoon pizza sauce on each chip, add about 1 tablespoon shredded mozzarella, and finish with small portions of chosen toppings.
Melt and finish
Bake for an additional 5–7 minutes at 425°F until cheese melts and edges color. Optionally broil for 30–60 seconds for light charring, watching carefully.
Cool and serve
Let chips cool on a wire rack for 2–3 minutes to firm up, then serve warm with extra sauce for dipping if desired.
Last Step: Please leave a rating and comment letting us know how you liked this recipe! This helps our business to thrive and continue providing free, high-quality recipes for you.
Nutrition
Did You Make This?
Leave a comment & rating below or tag
@flavordaisy on social media!
Categories:
You might also like...
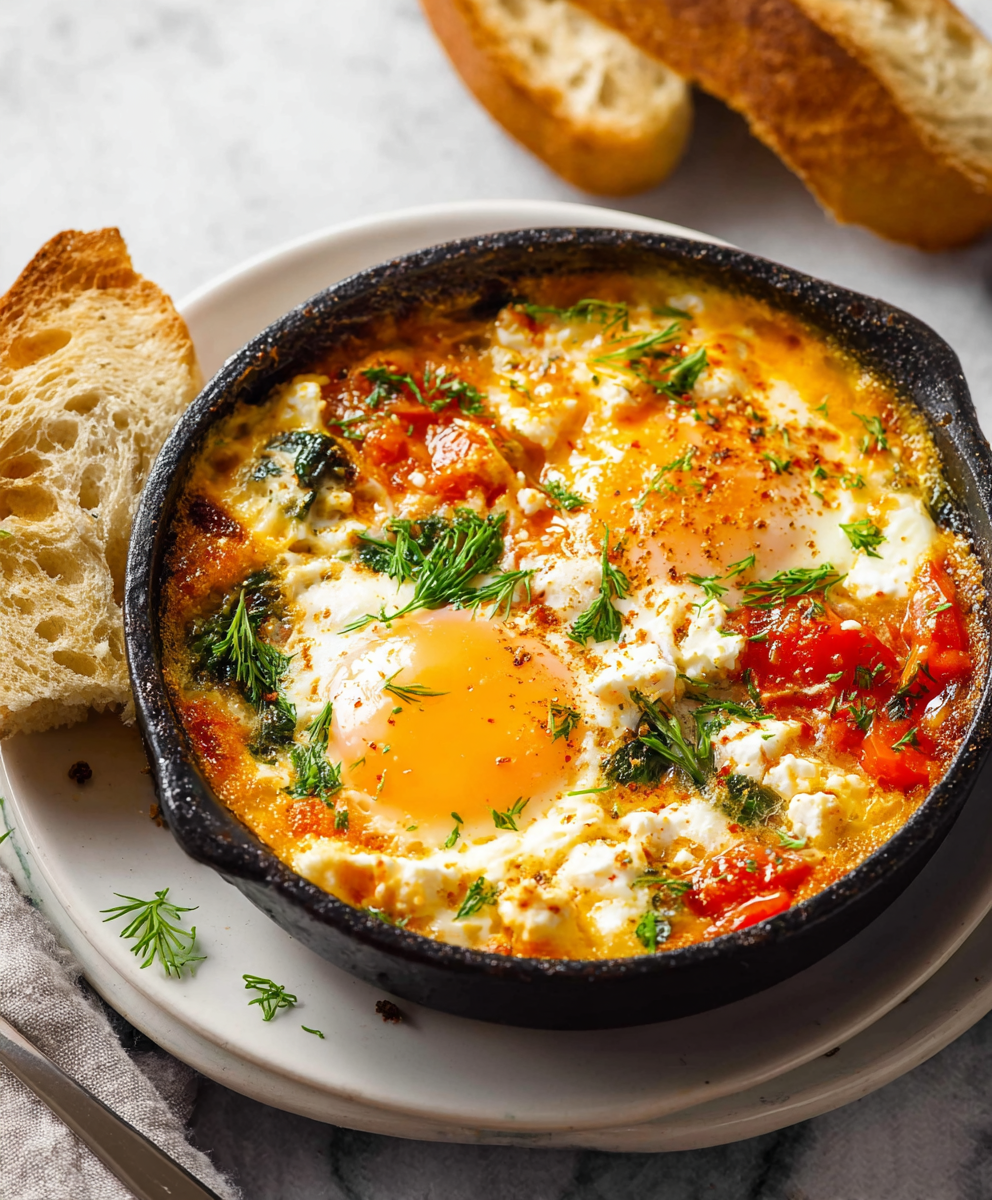
Baked Feta Eggs
A vibrant, oven-baked skillet of blistered tomatoes, creamy feta, spinach, and baked eggs — an easy Mediterranean-inspired one-dish breakfast or brunch.
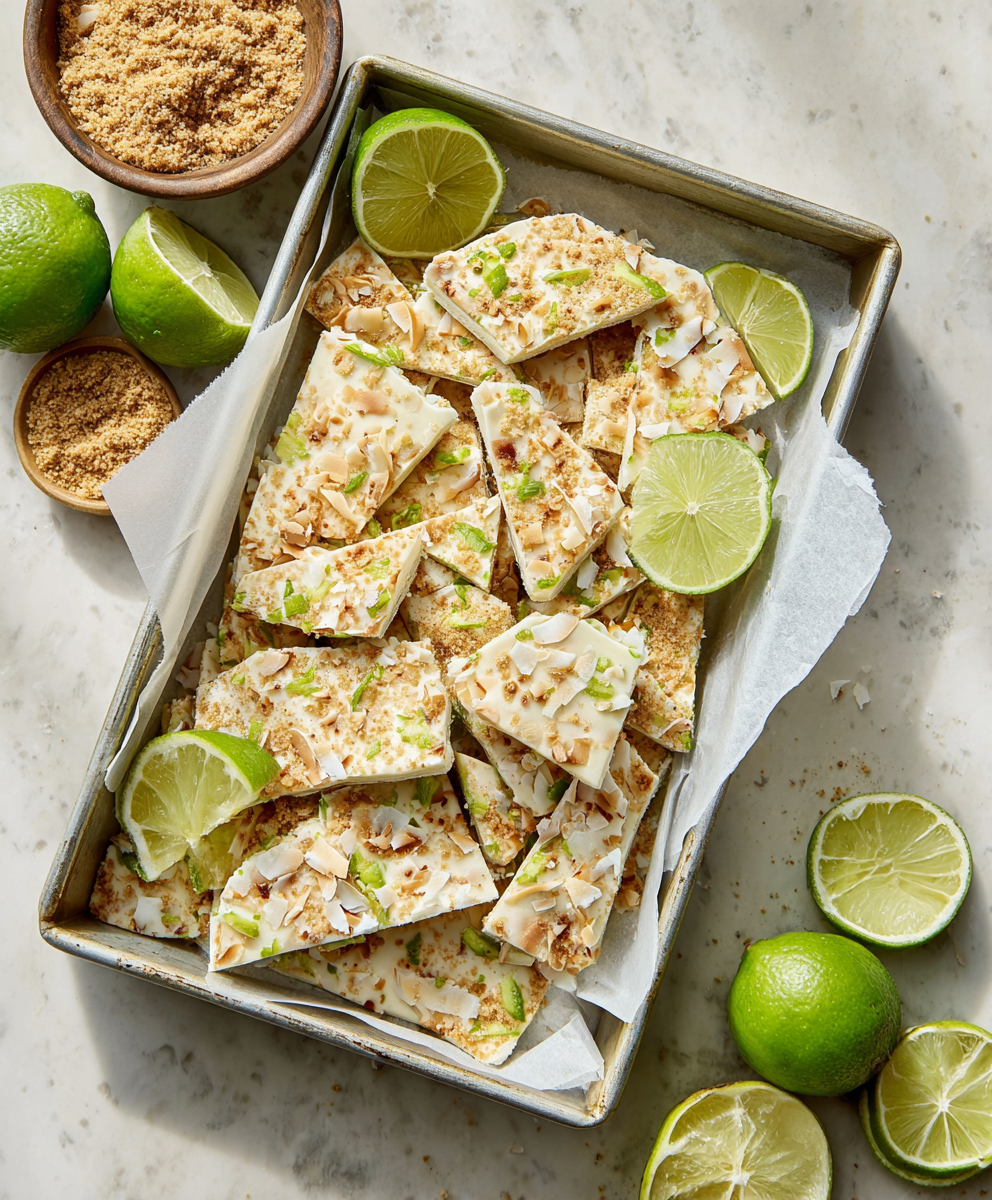
Key Lime Pie Yogurt Bark
A bright, tangy frozen treat that combines Greek yogurt, key lime, crunchy gluten-free crumbs and toasted coconut for a refreshing snack or breakfast boost.
Mediterranean Breakfast Sandwich
A bright, savory morning sandwich layered with creamy avocado, tangy feta, fresh spinach, and a perfectly cooked egg—Mediterranean flavors in every bite.
Did You Make This?
Leave a comment & rating below or tag @flavordaisy on social media!
Rate This Recipe
Share This Recipe
Enjoyed this recipe? Share it with friends and family, and don't forget to leave a review!
Comments (1)
This recipe looks amazing! Can't wait to try it.
Comments are stored locally in your browser. Server comments are displayed alongside your local comments.

Hi, I'm Chef!
What's Popular

30-Minute Meals!
Join to receive our email series which contains a round-up of some of our quick and easy family favorite recipes.